This article will provide the basic steps to make your Macbook IPv6 only. This is good for DNS testing if you have a website that you have recently enabled IPv6 on.
It will allow you to check to ensure your website or application loads correctly via IPv6, thus preventing potential errors for those connecting via IPv6.
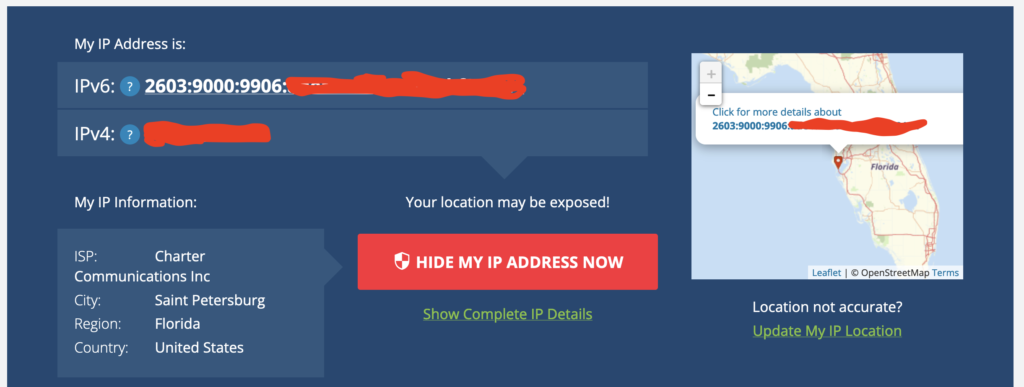
First Check You Have IPv6 ISP
Before proceeding ensure that you have IPv6 provided by your ISP by visiting What is My IP Address.
If IPv6 is provided via your ISP you will have an IPv6 address populated here:
If you have an IPv6 populated here proceed with the article.
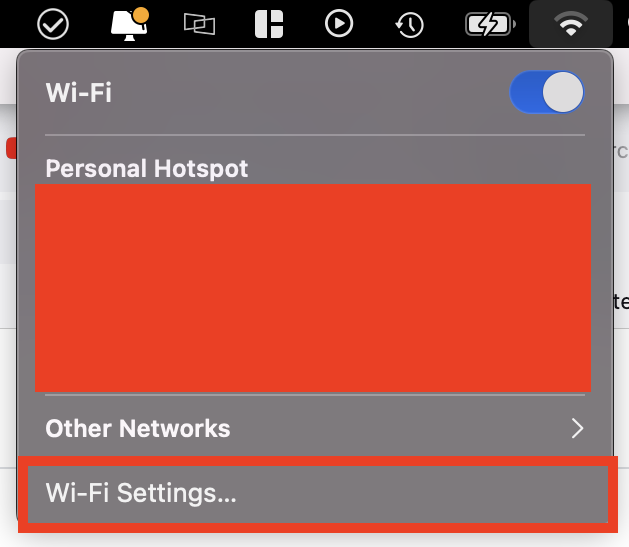
Lock Network To Use IPv6 Only
In the top bar click WiFi and then Click ‘WiFi Settings’:
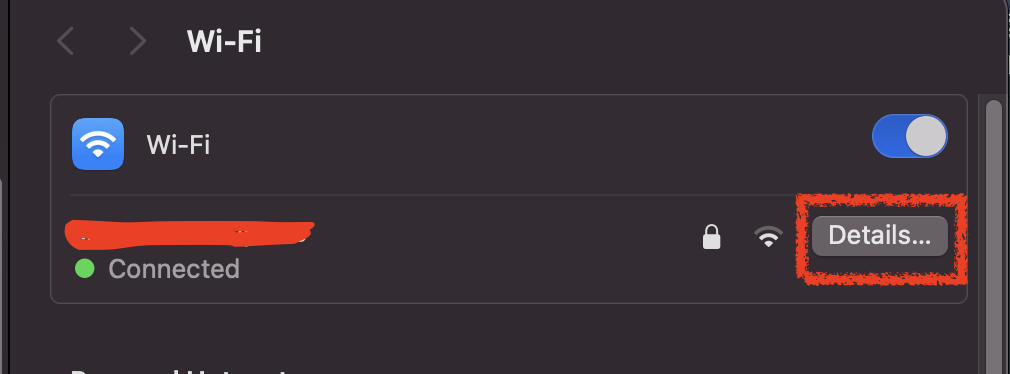
With WiFi settings opened click on the details button:
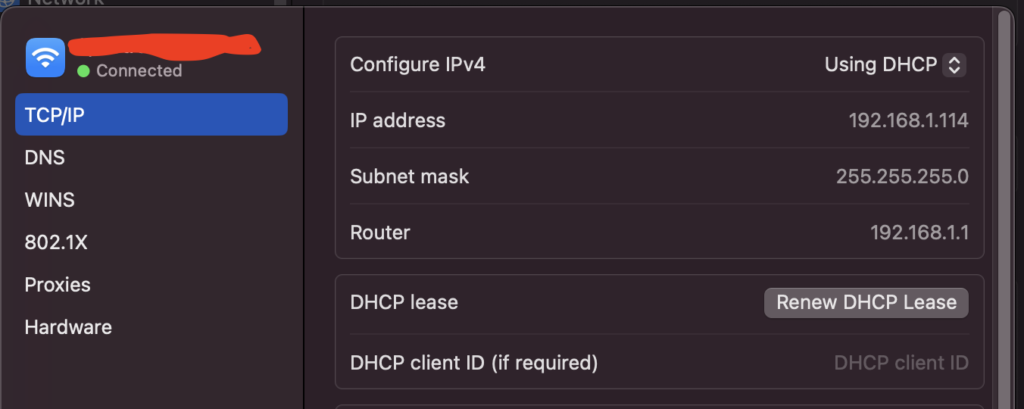
Now click on TCP/IP from the left:
You will see that Configure IPv4 will be set to Using DHCP, you need to change this to “Off“:
Once done click on “Ok” to apply the changes.
Conclusion
macOS is designed to switch between IPv4 and IPv6 as needed. However, since you’ve fully transitioned to IPv6, I strongly recommend thoroughly testing the change before using it exclusively. If you encounter connectivity issues, it’s likely because your ISP isn’t fully IPv6-ready or the websites/resources you are trying to access are not IPv6-ready. In such cases, you should enable IPv4 immediately.
In many cases, IPv6 outperforms IPv4 in terms of overall internet performance. IPv6 is highly efficient at routing, and capable of handling more data packets with minimal overhead. Have you ever noticed your device taking a while to connect to your router? Enabling IPv6 often resolves this issue, unless you have a subpar Wi-Fi router, in which case an upgrade might be necessary.
Even though your ISP may claim to be IPv6-ready, there’s a chance they have implemented it poorly. Therefore, thoroughly testing with IPv4 disabled will show whether you should use IPv6 exclusively or run it alongside IPv4.